Your reception counter needs to welcome visitors, support your team and fit your space. Yet it is easy to choose a desk that looks right online and discover that its return blocks a doorway or leaves too little room for your chair.
The best L shape reception counter fits three things: your floor plan, your daily tasks and your delivery access. Start with those checks before you choose a colour or finish.
This guide walks you through measuring, choosing the layout and comparing practical details. Whether you are furnishing an office, salon, clinic or showroom, you will know what to check before placing your order.
IN THIS ARTICLE
1. Decide Whether an L Shape Reception Counter Suits Your Business
2. Measure the Whole Reception Area
3. Choose the Correct Return Direction
4. Plan for Comfortable Work and Accessible Service
5. Match Materials and Storage to Daily Use
6. Shortlist Two Cagu Modu Options Against Your Brief
7. Compare the Full Cost and Service Details
1. Decide Whether an L Shape Reception Counter Suits Your Business
An L-shaped counter combines a main front section with a side section, often called a return. You can use the front to greet visitors while keeping equipment, paperwork or supplies on the return.
This layout can help you separate customer service from behind-the-scenes tasks. For example, you might take payments at the front while keeping your booking computer to one side.
However, an L shape needs enough room for both sections and the person working behind them. In a narrow entrance, a straight counter may leave a clearer path.
Before browsing styles, ask yourself:
- Where will visitors naturally approach?
- What equipment do you use throughout the day?
- How many people need to work behind the counter?
- Where will staff enter and leave the workspace?
- Where will customers wait during busy periods?
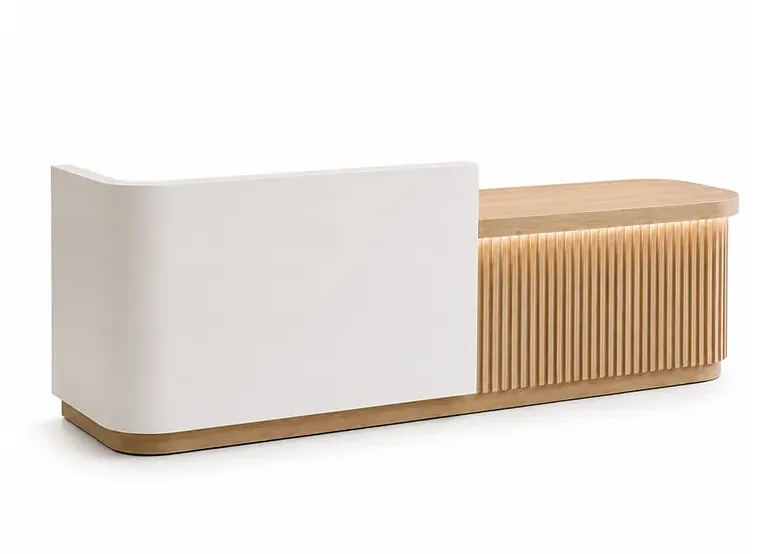
Your answers give you a useful buying brief. You can then explore modern fluted curved front reception counters with a clearer idea of what your business needs.
2. Measure the Whole Reception Area
Record more than the wall length
Measure your available floor area in millimetres. Include door openings, skirting boards, columns, power points and any furniture you plan to keep.
Next, mark the proposed counter outline on the floor with removable tape. Include the full depth of the front section and the return.
Place a chair inside the outline. Sit down, move back and stand up. Open nearby doors and walk through the area as a visitor would.
This simple test can reveal problems that are hard to spot on a product image. A counter may fit against the wall but still make the entrance feel crowded.
| What to check | What to record | Why it matters |
|---|---|---|
| Main counter | Overall width and depth | Shows how much of your reception area it occupies |
| Side return | Length, depth and position | Helps you check nearby doors and furniture |
| Staff workspace | Chair movement and space to walk behind it | Supports everyday movement |
| Visitor approach | Route from the entrance to the counter | Helps customers find and reach you |
| Storage | Drawer and cupboard opening space | Prevents clashes with chairs or walls |
| Delivery route | Doorways, corridors, lift and tight turns | Helps confirm that the packed counter can reach your room |
Check how the supplier labels dimensions. “Return length” could describe the full outside measurement or only the section extending from the main counter.
Ask for a dimensioned drawing if anything is unclear. Confirming one measurement before ordering is easier than fixing a poor fit later.
3. Choose the Correct Return Direction
Confirm which viewpoint the supplier uses
A left-hand return and a right-hand return can look similar in separate product photos. Suppliers may also describe the direction from different viewpoints.
Avoid ordering based on the word “left” alone. Ask for a labelled plan showing the return from the receptionist’s seated position.
Then check that the chosen layout keeps your staff entrance open and your equipment within reach.
For example, if staff enter from the right, a return on that side might interrupt their route. If power points are on the left, placing equipment on the opposite side could make cable routing harder.
Walk through a normal customer visit
Imagine greeting a visitor, checking a booking, taking payment and handing over a document.
Can you complete those tasks without repeatedly turning away or walking around the counter? Can another staff member pass behind you?
Choose the direction that makes your busiest tasks easier. Do not assume the return can be reversed after delivery; confirm whether that is possible for your selected model.
4. Plan for Comfortable Work and Accessible Service
Separate the customer surface from your work surface
A raised front panel can help screen everyday desk clutter. However, the surface you use for typing needs to work with your chair, monitor and seated position.
Check usable desktop depth, legroom and where your keyboard will sit. Allow space for cables without pushing your screen too close.
If two people will share the reception area, test the layout with both work positions marked. A long counter does not automatically provide two comfortable workstations.
Make your reception easier to approach
Consider visitors who use wheelchairs or mobility aids, as well as anyone who prefers to complete paperwork while seated. Review the approach route and whether you need a lower service section with suitable clearance.
For Australian fit-outs, review the government’s Premises Standards guidance and ask your building certifier or access consultant which requirements apply to your premises. A product photo or “accessible” label alone cannot confirm that your complete layout is suitable.
5. Match Materials and Storage to Daily Use
Choose a finish you can maintain
Your counter will face bags, keys, drinks and regular cleaning. Ask about the actual surface material, edge construction and recommended cleaning products.
If you run a clinic or salon, confirm compatibility with the cleaners you use. Avoid assuming that every decorative surface tolerates the same products.
Colour also affects the look of your reception. Light finishes can create a bright impression, while timber-look finishes can add warmth.
Give everyday items a place
List what you need to store before choosing cupboards or drawers. Your list might include forms, stationery, payment equipment and personal belongings.
Keep frequently used items close to your main work position. If you handle confidential documents, check whether suitable lockable storage is available.
Also confirm where cables enter and exit the desk. A tidy front view is much easier to maintain when you plan equipment and storage together.
6. Shortlist Two Cagu Modu Options Against Your Brief
Once you know your measurements and workflow, compare two products side by side. Start with fit, then check appearance and cost.
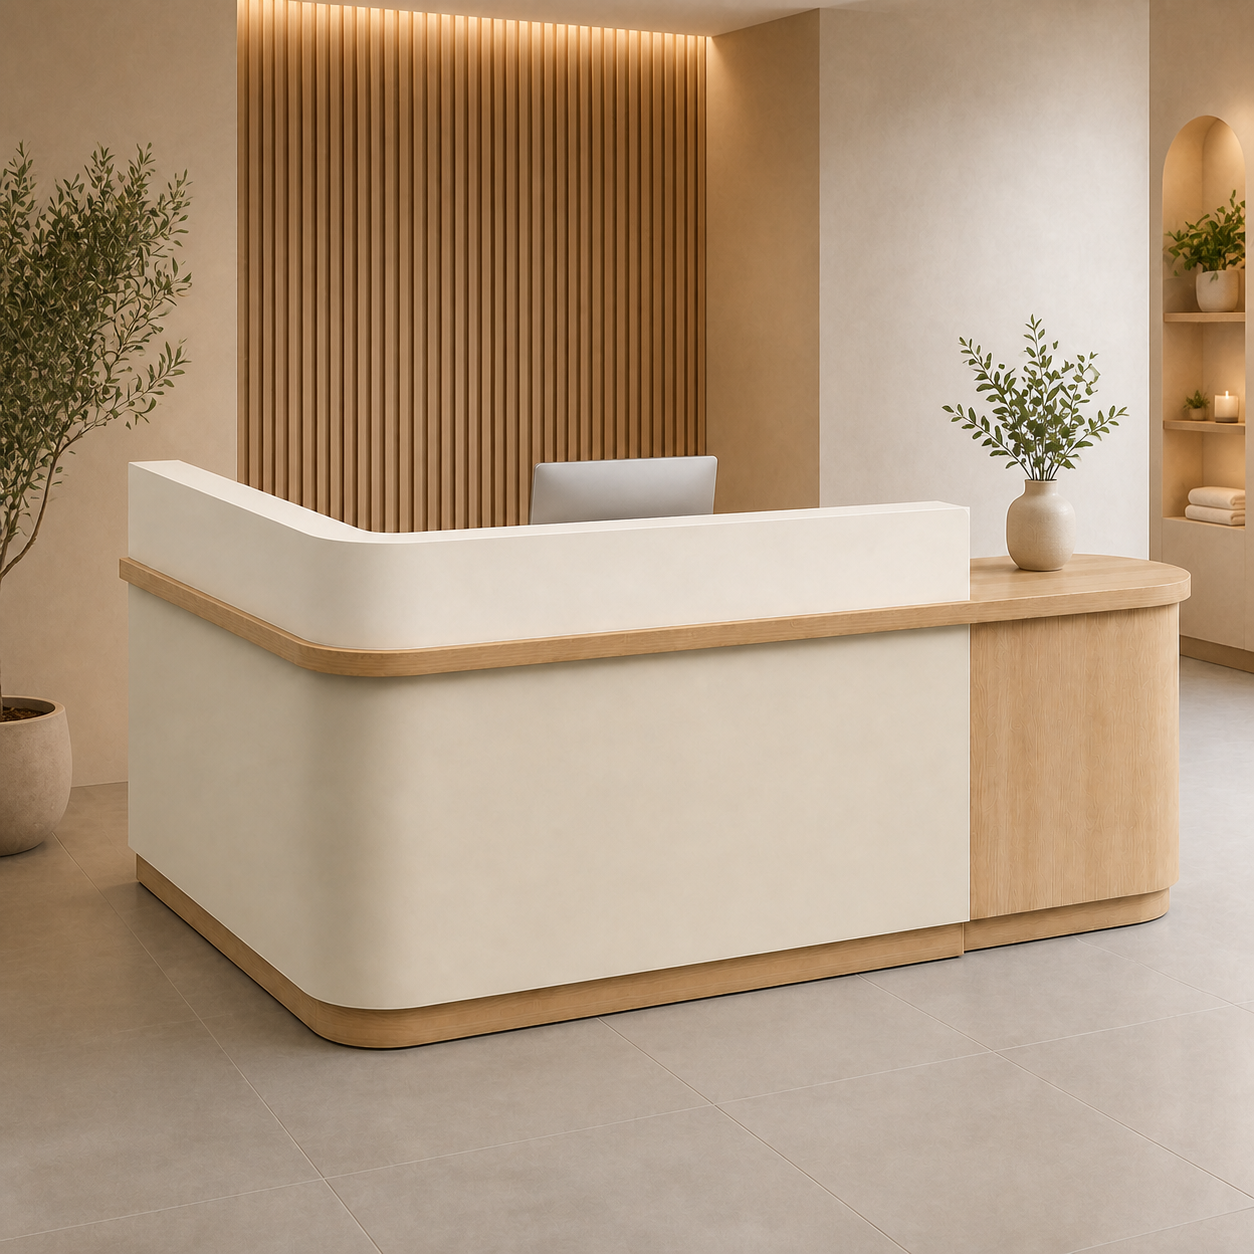
Use CAGU MODU Natural Minimalist Style L-Shaped Reception Counter RD-352 - option one as your first shortlist entry. Compare its confirmed dimensions, return direction and usable workspace with your floor plan.
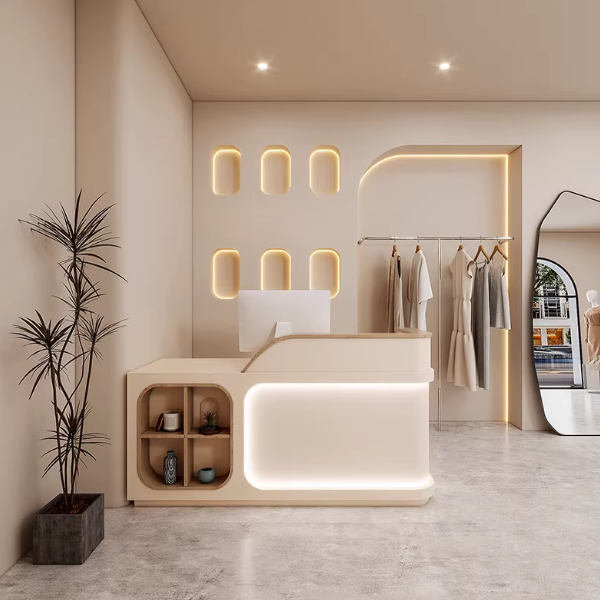
Then review CAGU MODU Modern L-Shaped Cream Reception Desk RD-241 - option two using the same checklist. Check what changes between the options, including finish, storage and delivery requirements.
If neither standard layout meets your needs, ask CAGU MODU about customizable styles. Explain the problem you are trying to solve, such as an awkward entrance or a particular visual style.
Before approving a custom order, confirm the available changes, final drawing, price and lead time in writing. Customisation is most useful when it solves a clear requirement.
7. Compare the Full Cost and Service Details
A useful quote tells you more than the furniture price. Ask for the total in Australian dollars, including GST, delivery charges and any agreed customisation.
With CAGU MODU, you can plan your purchase around these service features:
- ABN-registered business: business details you can use for purchasing records.
- GST-inclusive pricing and a tax invoice: clearer paperwork for your accounts team.
- Customisable styles: options to discuss when your space needs a different look.
- Door-to-door delivery: delivery arrangements to confirm for your address.
- No assembly required: less furniture assembly to organise on arrival.
- Careful packing for safe delivery: protection during transport.
- Three-year warranty: coverage to review before you order.
ABN registration and GST registration are separate matters. For your records, check that your invoice contains the required supplier and GST details. The Australian Government’s guide to invoicing explains the relevant invoice information.
Read the warranty terms so you understand the coverage, exclusions and claim process. Keep your invoice and order details somewhere easy to find.
8. Prepare for Delivery Before Ordering
A reception counter that needs no assembly still needs a clear route into your premises.
Ask for the packed dimensions and weight. Check loading access, lift limits, corridor corners and the narrowest doorway along the route.
Confirm what door-to-door delivery includes at your address. Entry into the building, stairs, final positioning and packaging removal should be clarified rather than assumed.
If your building has delivery hours or requires a lift booking, arrange these ahead of time. Clear the reception area before arrival and decide where the counter will sit.
When it arrives, inspect the packaging and furniture, take photos of any visible damage and contact the supplier promptly if you find a problem.
Key Takeaways Before You Buy
- Measure the counter footprint, working area and delivery route.
- Confirm the return direction on a labelled drawing.
- Test staff movement and the visitor approach.
- Check materials, storage and cable access against daily tasks.
- Compare the full GST-inclusive cost and delivery scope.
- Confirm custom details and review the three-year warranty terms.